Uploading a project
Step-by-step guide
This article provides a step-by-step guide showing how to create an Overleaf project by uploading a .zip file containing LaTeX files stored on your local computer.
- Create a
.zipfile containing your local files (images, bibliography, fonts,.texsources, etc.). - If your local LaTeX project uses folders, these can be preserved in the
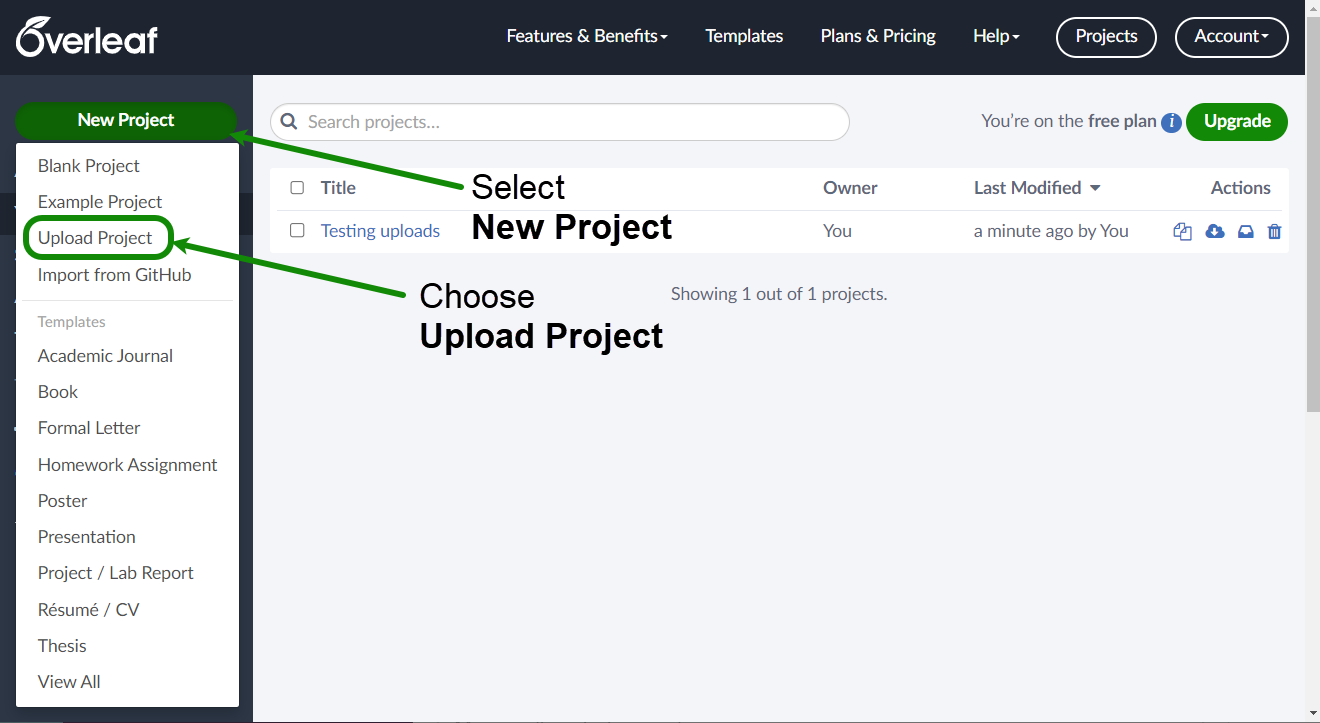
.zipfile and will be reconstructed when the.zipfile is unpacked on Overleaf. - In the Project Management page, select New Project then choose Upload Project from within the drop-down menu.
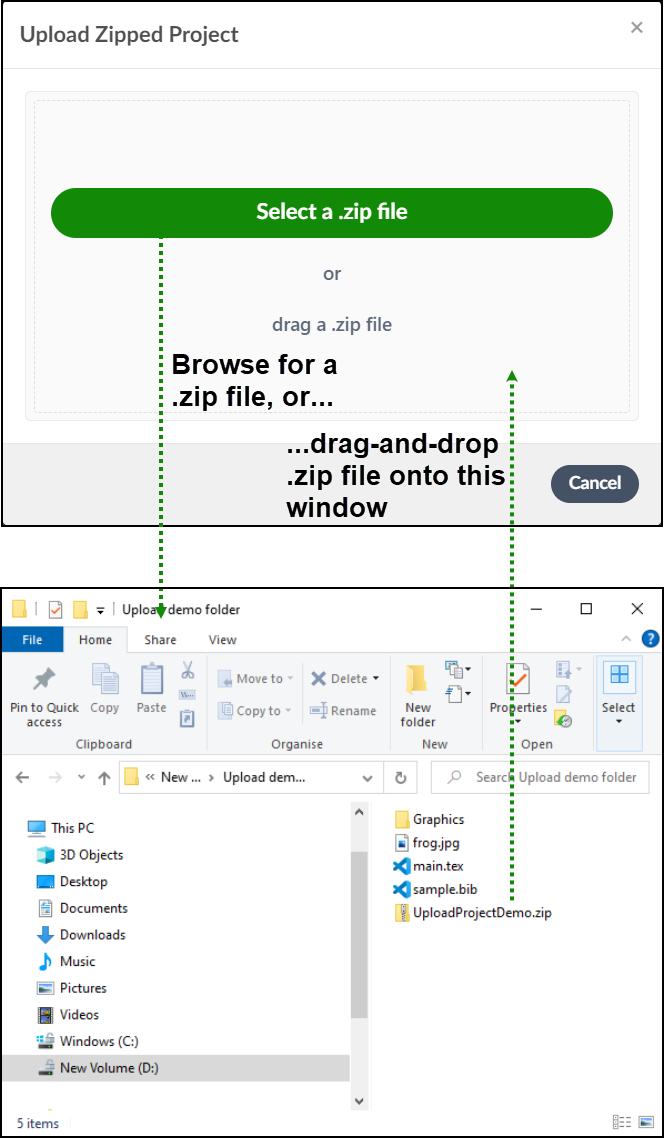
- A window is displayed, onto which you can drag-and-drop your
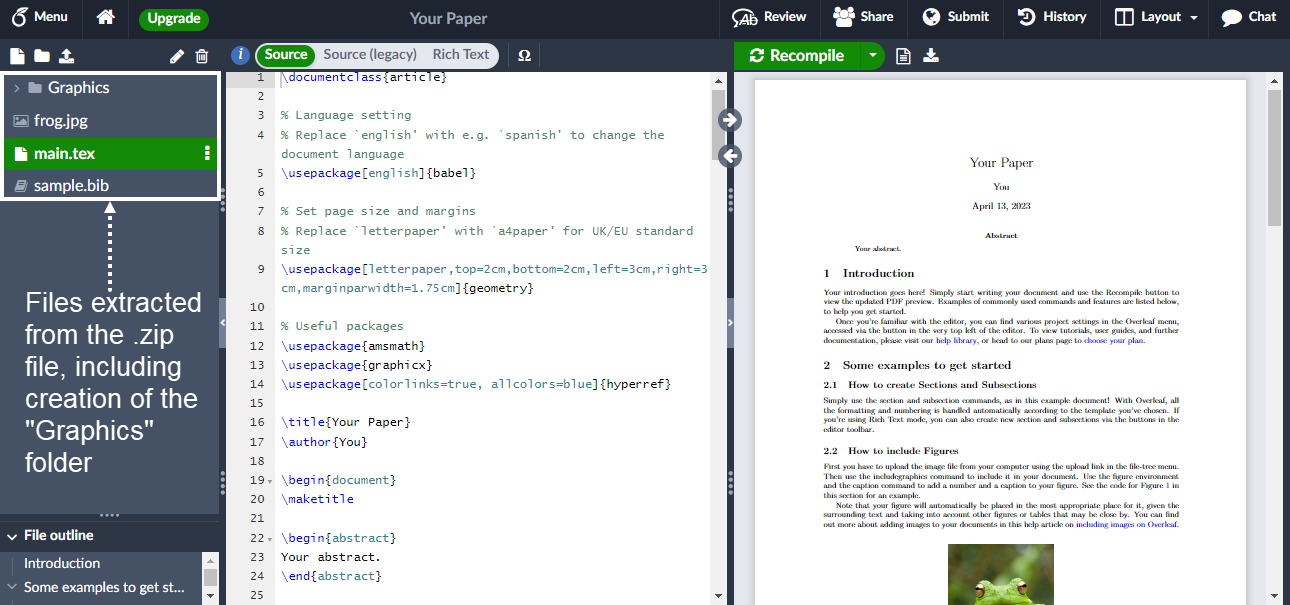
.zipfile or choose Select a .zip file to locate a.zipfile stored on your device. - Overleaf decompresses the uploaded
.zipfile to extract the files and create any folders in your project. - You are then redirected to the editor, where a new project has been created.
- You now have a new Overleaf project, ready for editing and recompiling. Note: if your LaTeX code needs LuaLaTeX or XeLaTeX you may need to set the project's LaTeX compiler.
Additional guidance on file uploads (including restrictions/limits)
If you plan to upload large projects, here are some Overleaf resource limits/restrictions you need to be aware of:
- You cannot upload individual files which exceed 50MB.
- Each upload can contain up to 180 files—if you attempt to upload more than that, only 180 files will be uploaded.
- Each Overleaf project cannot contain more than 2000 individual files.
If your project’s .zip file exceeds 50MB you can try this:
- Upload a subset of your files in a
.zipfile (just to create the project). - Manually upload the remaining files.
For a .zip file to upload properly:
- It should contain only file types that a LaTeX compiler can process: plain text files and images in
.eps,.pdf,.svgand.pngformats. - It cannot contain more than 7MB of material that can be edited on Overleaf (this is the maximum editable data for a project on Overleaf). For further information, please refer to the page What is the maximum compilation time, file number and project size allowed on free vs paid plans?
Although the Overleaf editor can edit any plain text file, only those uploaded files with the most common LaTeX file extensions will be editable on the site—such as .tex, .bib, .cls, .sty etc. Suppose you need to edit a project file with a different extension. In that case, it is best to copy and paste its content into a new blank file within the project and then save it with the desired file extension; alternatively, upload it with a .tex extension and change it once online.
Text files larger than 2MB cannot be edited online and don’t count toward the 7MB limit, which means, for example, you can upload large .csv files for use with Rtex without using up your 7MB editable data allowance.