An easier way to insert figures in Overleaf
September 19, 2023Ever wished you could click a button or copy and paste to insert your figures into Overleaf? Now you can! Our team has been busy creating a new way to insert figures that is simpler and allows you to focus on your content.
How do I use it?
Using this handy new feature couldn’t be easier. Just click the ![]() Insert figure icon in the Overleaf editor toolbar (which is now available in Visual Editor and Code Editor). Alternatively, just copy and paste an image file from your computer directly into the editor.
Insert figure icon in the Overleaf editor toolbar (which is now available in Visual Editor and Code Editor). Alternatively, just copy and paste an image file from your computer directly into the editor.
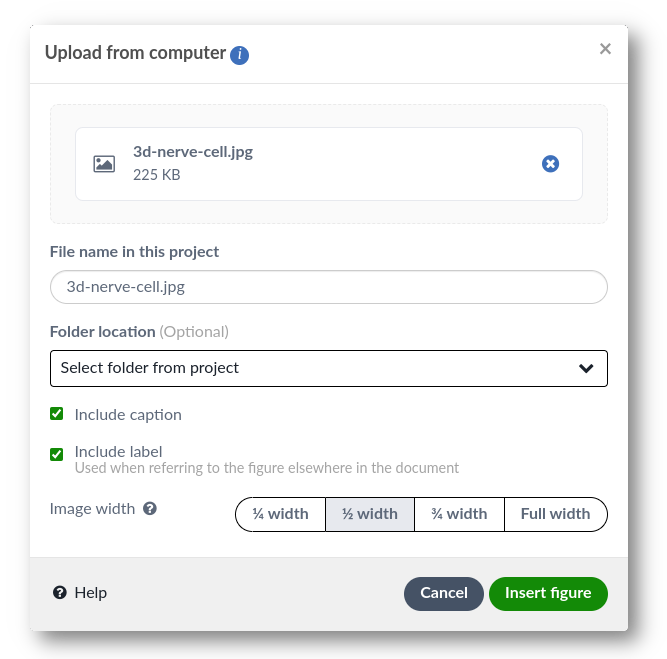
If you click the Insert figure button, you can choose to upload an image from your computer, select from your project files, use a file from another project, or even get an image from a URL. Once you’ve decided, you’ll see a dialog box that helps you set up the layout of your figure—for example, you can choose its size and whether or not you want a caption and label.

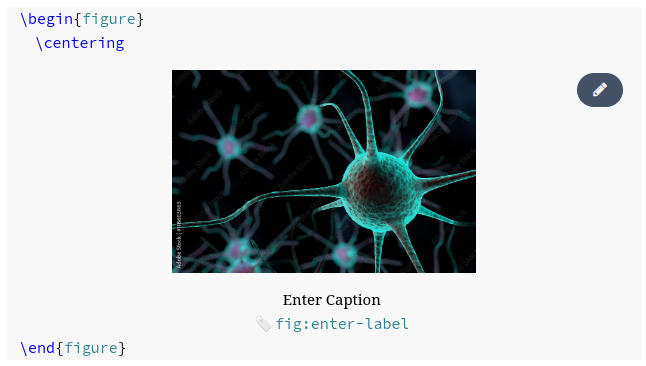
If you’re in Code Editor, when you click Insert figure all the LaTeX code will be added to your project for you. Or if you’re in Visual Editor you’ll get to see the figure live in the editor window.
In Code Editor:

In Visual Editor:

You can then click on the caption or label to edit them. Simple!
What if I want to customize my figures?
There are lots of options to edit and customize your figures, such as wrapping text around the figure, rotating the image, or including multiple images in a single figure. You’ll need to edit the LaTeX code to do this. Find out how!
Do more with the toolbar in Code Editor
Default theme (dark)

Light theme

Users of our Visual Editor will probably already be familiar with our editor toolbar, but it’s a new addition to our Code Editor. As well as providing a quick way to insert figures, there’s lots more you can do with it (from quickly adding bulleted and numbered lists to inserting math). And be sure to check back soon—a new way of inserting and editing tables is nearly here!